This week I have been doing more walk cycles geting to grips with the graph editor and sorting out the tangents. Also this week me and Dan C have been talking about differernt ways to possible use an existing rig with all the controls and tranfering this to our character that Anna and Dan R are making. The benifts of doing this would be that it will save a lot of time and over coming some problems that we might encounter. This would leave us more time to animate and prefect more to our liking.
If we cant find a way to do this then it wouldnt be much of a downfall, but just eats into time that is running out very fast.
Anna and Dan R have transferred there low ploy head models from Maya into Z brush to start sculpting detial and defining more definition. This was quite a slow process as they were quite new to the programme and from experience hard to get to grips with all the tools and navigating round the screen.
We encounterd an obvious problem when going to save what they been working on for a couple of hours. When they had gone to save what they had done they saved it as "Document" as its the first button to click as seem some obvouis to click. When coming back after lunch and going back to what they had been working on they couldnt edit any thing. This had been such a waste of time and effort. To over come this small problem we experiment and tried "save as tool" and not document. But to save it as a tool is the second option and doesnt seem logical to be first choice.
This set them back and was VERY frustraing but on the positive side Anna and Dan R had got better at Z brush and the way to aproach sculpting the head of there character.
On Wednesday we had to edit our films that we short a couple of weeks earlier. I had been looking at lots of different tutorials on the internet as there was this one site that had all the tutorials as videos so you can follow them with out getting lost too easily. These were very Helpfull in adding little effects to my short film.
Today we had some feedback fom the first term animation that were shown to class. This was usefull as we could get feedback and coments from other people in our class. Also I have been updating my blog and ready for the aformative on friday.
For the rest of the week me and Dan C should be able to have the head of the character and maybe the body so we can rig the and weight the body ready for animating.
Thursday, 31 January 2008
walk cycle Test
I have been going back over the proecess of doing a walk cycle in maya and the first atempt was to say the least crap! lol The reason behind this was the timing in the walk and little overlap and follow though.
So after this test I went right back to basic, and read up on some of the animation book that I have at home looking at the differnt steps that are involved in the cycle and differnt follow through and secondary aniamtion.
It not that I dont understand the process of the walk cycle, its just transfering the skils into the 3D package and using the right tools for the job.
I was getting better in doing the cycle but it was taking a very long time where I was not that
conforident it doing it.
After I showed Dan C my very poor attemps, hahaha he showed me the way he would animate his walkcycle and what tricks and skils that he would use. He showed my the first step in the cycle using and tweeking the points in the graph editor to get more flow and control in the walk.
This really helped me to get a better understanding with using maya doing the walk cycle.
Thanks !
Normal mapping testing in Maya
After see what Dan C was doing with normal mapping and after he showed us briefly on how creat the normal maps, I wanted to test it out for my self.
The first couple of test that i done looked fine in the view port but when it rendered there was nothink there. I couldnt under stant why. So I went back over the process and changed a few different options in the transfer window and changed and one option so that the camera was facing the obejct all the time,
You can see the difference in the view port where you have the high poly and the low poly.

Here is an image of the normal map that was mapped to the sphere.

Software Render; here you can see below that the render on the left is lower quality then the Mental Ray.

Mental Ray Render. Here you can see see the quality is alot better and near enough the same as the high poly version.


Another normal map that I made was for a die.

You can see the difference in the view port where you have the high poly and the low poly.

Here is an image of the normal map that was mapped to the sphere.
Software Render; here you can see below that the render on the left is lower quality then the Mental Ray.

Mental Ray Render. Here you can see see the quality is alot better and near enough the same as the high poly version.
Another normal map that I made was for a die.

Saturday, 19 January 2008
Dusty Test
For our scene that we are going to create, we wanted to have dust particles when the character walked, ran or jumped onto the ground.
These tests were done with a pre-rigged character walking so I just had to make the particles when he walked.
The first test came out ok but there was more room of tweaking it,
So I played around with a few of the setting and made it look a lot better.
Totem Poles
A totem pole is a symbol of unity, tradition and pride. It represents a family's histories, relationships, stories, beliefs and experiences. A pole shows animals and mythical figures associated with a family.
Totem poles are monumental sculptures carved from great trees, usually cedar, typically Western Redcedar, by a number of Indigenous cultures along the Pacific northwest coast of North America.
Vertical order of images is widely believed to be a significant representation of importance. This idea is so pervasive that it has entered into common parlance with the phrase "low man on the totem pole". This phrase is indicative of the most common belief of ordering importance, that the higher figures on the pole are more important or prestigious.


Totem poles are monumental sculptures carved from great trees, usually cedar, typically Western Redcedar, by a number of Indigenous cultures along the Pacific northwest coast of North America.
Totem poles are carved, not by one carver, but by a head carver and a number of apprentice-carvers. The head carver has a reputation to uphold. To be certain the totem looks professional, the chief carver personally carves or seriously supervises the bottom ten feet of the pole. Inexperienced apprentices are allowed more freedom to carve the higher regions. Therefore the bottom of all totem pole is sometimes the best carved part of the whole pole. Meaning wise, the low man has a much or more meaning than other figures.
Vertical order of images is widely believed to be a significant representation of importance. This idea is so pervasive that it has entered into common parlance with the phrase "low man on the totem pole". This phrase is indicative of the most common belief of ordering importance, that the higher figures on the pole are more important or prestigious.
Authentic full size totem poles today, cost in the region of $25,000 to $100,000
My Totem pole designs and reference images


Friday, 18 January 2008
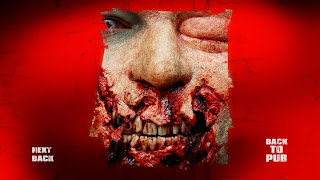
Zombies
A zombie is a reanimated corpse. Stories of zombies originated in the Afro-Caribbean spiritual belief system of Vodou, which told of the dead being raised as workers by a powerful sorcerer. In modern horror fiction, zombies are generally undead corpses brought back from the dead by supernatural or scientific means, and are rarely under anyone's direct control. They typically have very limited intelligence, and hunger for the flesh of the living.
We typically didn't want to go for the slow type zombie is our game, so we had the idea of that while she wasn't fighting she moved slowly, stumbling around, but while she was fighting she moved really fast.
Dawn of the dead
I Am Legend

We typically didn't want to go for the slow type zombie is our game, so we had the idea of that while she wasn't fighting she moved slowly, stumbling around, but while she was fighting she moved really fast.
Zombies Film:
Shaun of the Dead28 days later / 28 week later
Resident Evill
Night of the living deadDay of the dead
BraindeadDawn of the dead
I Am Legend
The world's largest zombie walk was held on October 29, 2006 in Monroeville Mall in Pittsburgh, Pennsylvania, the setting of Romero's original Dawn of the Dead film. The walk consisted of 894 attendees who all were instructed to bring canned food for a local food drive.
Reference picture below from Shaun of the dead


Weapons
Tomahawk generally used by Native North Americans as a hand weapon and as a missile. The earliest tomahawks were made of stone, with one edge or two edges sharpened.
European traders the stone implements were rapidly replaced by European-manufactured tomahawks of steel (trade tomahawks). Some tomahawks were also equipped with a pipe bowl and a hollow stem, which were used for smoking. The ceremonial tomahawk usually was richly decorated with feathers and paint.
Here are some designs that I have done of different weapons below which either can be uses or just as objects in the back ground.


Theses were the different weapons thats the zombie uses at the top of the totem pole which then will break off into two weapons.


Theses were the different weapons thats the zombie uses at the top of the totem pole which then will break off into two weapons.


TeePee's
The tepee was the home of the Plains Indians.
Native American homes were designed so that they could be moved easily.
Native American homes were designed so that they could be moved easily.
The most common home was called a wigwam (Teepee's). It was a covered wooden frame shaped like a cone pointed together and fastened at the top.
These coverings were made from animal skins which fastened to the ground. These Indians would often paint decorations on the outside of the teepee and would have a fireplace inside the tepee to cook and keep warm.
The coverings were carried from location to location. The completed teepee's would be about 15 feet in diameter usually housing ten to twelve people.
When a new wigwam was needed, women often worked together to build it. This was an important task and one that took skill and knowledge. Some women looked for suitable poles to build the frame.
An open teepee flap was an invitation to enter. If the flap was closed.
Ideas and reference images.


Ideas and reference images.


Thursday, 17 January 2008
Native Americans
Long before the white man set foot on American soil, the American Indians, or rather the Native Americans , had been living in America. When the Europeans came here, there were probably about 10 million Indians populating America north of present-day Mexico. And they had been living in America for quite some time.
The oldest documented Indian cultures in North America are Sandia (15000 BC), Clovis (12000 BC) and Folsom (8000 BC)
The name "Indian" was first applied to them by Christopher Columbus , who believed mistakenly that the mainland and islands of America were part of the Indies, in Asia.
All the Indian names have meaning to them and are often reflected in the personality. Here are some names that Anna-marie research.
ENOLA: solitary
ETENIA: rich
EYOTA: great
ANGENI: spirit
TALA: wolf
WYANET: beautiful
APENIMON: worthy of trust
BEMOSSED: walker
HONOVI: strong
IYE: smokeJ
ACY: moon
NAYATI: he who wrestles
Living through forced moves, war, starvation, diseases, and assimilation, these strong and spiritual people managed to keep their many legends and stories alive. Passed down through the generations, these many tales speak of timeless messages of peace, life, death, and harmony with nature
While cultures and customs varied among the tribes, they all believed that the universe was bound together by spirits of natural life, including animals, water, plants, the sky, and the Earth itself.
Here is a quick little map of what our could scene could look like.

Here are some of the different objects that could be in the scene like guard towers, camp fire and a water well.


MAXIMUM Picture
Here are some screen shots taken from the game to show how real the images are within the game and what the CryENGINE2 is capable of producing. Some are easier to tell the difference between them but some are alot harder


If you couldnt tell the difference bewteen them the in game picture is on the right!


If you couldnt tell the difference bewteen them the in game picture is on the right!
MAXIMUM Crysis
I a found a video clip of the lighting within the game called Crysis which is definitely the best PC game of 2007 !
This game has a highly advanced next gen game engine called CryENGINE2.
Below are some videos of the physics that are used within the game! I have got to say they are AWESOME ! got to watch them all!
Got to watch the ending on this one below
This game has a highly advanced next gen game engine called CryENGINE2.
Below are some videos of the physics that are used within the game! I have got to say they are AWESOME ! got to watch them all!
Got to watch the ending on this one below
Shedding some Lighting
I have found a great web site that show you how important lighting is with a game scene, without the dynamic lighting the you would not enjoy playing the game.
Eric Gooch works for Insomniac Games in Burbank, California. He is a lighting artist and has worked on Resistance: Fall of Man. He works with Maya, Photoshop, Lightwave, Digital Fusion and other programmes
Below is the link to the lighting that he has worked on Resistance: Fall of Man, if ypu wait till the page has loaded up properly you can move your cursor over the picture to see the before and after!
http://www.cybergooch.com/tutorials/pages/lighting_rfom1.htm
The job of a lighting artist is pretty much what one would expect: you create and place the lights in the levels in an effort to create a believable, realistic world. The methods you use to create and place these lights will differ greatly, depending on the programs and tools in use at the company you work for. But by and large, there are a lot of similarities regardless of the specific tools, just as there are a lot of similarities between different 3D programs.
http://www.cybergooch.com/index.htm
Here are some images that I have taken from the website.


Normal mapping
Normal Maps & Texture maps
Normal mapping is a great way of showing more detail on a 3D model by simulating the way the surface detail responds to light. It is a 2D effect so it will not change the shape of an object, but inside the profile outlines it can simulate a tremendous amount of extra detail. This is very useful for real time game engines where processing power is a limiting factor or animations where it’s render time that can be the limiting factor.

Normal mapping is a great way of showing more detail on a 3D model by simulating the way the surface detail responds to light. It is a 2D effect so it will not change the shape of an object, but inside the profile outlines it can simulate a tremendous amount of extra detail. This is very useful for real time game engines where processing power is a limiting factor or animations where it’s render time that can be the limiting factor.
It’s very similar to bump mapping in that they both achieve the same effect.However, bump mapping simulates vertical offsets relative to the face direction it’s projected on, new directions are a result of the height differences between neighboring pixels. Normal mapping on the other hand uses colors to indicate directional offsets, making it far more efficient.
The red channel in a normal map encodes the left-right axis of normal blue channel encodes vertical depth.
Here in these picture below you can see how low poly they are but yet how detailed they are because of the normal mapping.


In Game Environment/Characters
"For every major character, we build two versions of the geometry: a renderable mesh with unique UV coordinates, and a detail mesh containing only geometry. We run the two meshes through the Unreal Engine 3 pre-processing tool and generate a high-res normal map for the renderable mesh, based on analyzing all of the geometry in the detail mesh."
With this idea of having a two forms of low and high poly characters we can do the same process of taking the high res normal mapping onto the low poly character to have the same detail of the high poly model but only having an actual low poly version.These are taken from the Unreal engine on a typical character model.
Renderable Mesh: We build renderable meshes with 3,000-12,000 triangles, based on the
expectation of 5-20 visible characters in a game scene.
Detail Mesh: We build 1-8 million triangle detail meshes for typical characters. This
is quite sufficient for generating 1-2 normal maps of resolution
2048x2048 per character.
Bones: The highest LOD version of our characters typically have 100-200 bones,
and include articulated faces, hands, and fingers.
Environments
Typical environments contain 1000-5000 total renderable objects, including static meshes and skeletal meshes. For reasonable performance on current 3D cards, we aim to keep the number of visible objects in any given scene to 300-1000 visible objects. Our larger scenes typically peak at 500,000 to 1,500,000 rendered triangles.
Games Engines Reserch
For our brief we wanted to keep with in the rules of using a game engine, like keeping the characters low poly to a limit of say 20,00 ploy’s and having different levels of texture depending on how far away you are from different objects, 512x512, 1024x1024 textures as well as other factors.
From this I started looking into different game engines for the latest games available.
Below is a list of a few different game engines.
Doom engine
Quake II engine
id Tech 4
Havok
INSANE
RPG Maker XP
Unreal engine
Doom engine
Quake II engine
id Tech 4
Havok
INSANE
RPG Maker XP
Unreal engine
The Unreal Engine is probably the most widely used and recognised games engine for most games developed by Epic Games.
First illustrated in the 1999 first-person shooter game Unreal, it has been the basis of many games since, including Unreal Tournament, Mass Effect, Tom Clancy's Rainbow Six 3: Raven Shield, America's Army, Tom Clancy's Rainbow Six: Vegas, Red Steel, Gears of War, BioShock, Tactical Ops and so forth. Although primarily developed for first-person shooters, it has been successfully utilized in a variety of genres, including 3rd-person stealth (Tom Clancy's Splinter Cell)
The third generation Unreal Engine was designed specifically for DirectX 9/10 PCs, the Xbox 360 and PlayStation 3 Its renderer supports many advanced techniques including HDRR, per-pixel lighting, and dynamic shadows, and builds upon the tools available in previous versions of the engine.
Crysis uses a new engine the CryENGINE2 that is the successor to Far Cry's CryENGINE. CryENGINE2 is among the first engines to use the Direct3D 10 (DirectX 10) framework of Windows Vista, but can also run using DirectX 9, both on Vista and Windows XP
Roy Taylor, Vice President of Content Relations at NVIDIA, has spoken on the subject of the engine's complexity, stating that Crysis has over a million lines of code, 1GB of texture data, and 85,000 shaders.
Monday, 14 January 2008
Smoothing the details out
Today we have been playing round making a simple block out in Maya of what our scene could look like and where thing should be placed. This is very important as we need the same vision of though on the same scene. We had to do this all together as once again all have different visions in our head.
After we done this and as all happy with it, we started on writing our own group brief and criteria and later on showed this to our tutor which was approved by him. Yay !
Next on our list was to finalise the story on what each scene should look like and how the character interact with each other as a game play and cut scene.
Back again for round two of the Blog !
Well back doing the blog with a little more knowledge of what I am supposed to be putting up here now!
Well I will roughly fill you in last week’s events leading up to the present day and what’s to come!
Prior to starting this term we had sort out a group that would be good to work in and roughly know what each other would like to do in terms of modelling and animating, which was good as we can spilt up the work load between us all and help each other when needed.
With in the first 3 days we had pretty much refined our initially random ideas down to a few which we thought could take further and more in depth. The next day we had basically got an idea that we all like the sound of and wanted to explore it more. We had been given the actual brief with our limitation, and guide lines to follow, and with a section to make our own brief was most appropriate with tieing in the games element with our idea.
We had found our setting for the scene and where we wanted it going. We had looked at lots of different games in similar game play, style and ones which had suitable female character that we like. I.e.. like in Heavenly Sword and Tomb Raider, Rayne, Jill Valentine, Ada Wong in the Resident Evil Series, Brave, Metal Slug Zombies.
At the end of the week we went away to come up with character ideas an environment list of objects to be in there and a rough map of where certain objects should be placed in our scene as we all visualise it in different ways.
That kind of brings it to the present day on what we have done so far.
Subscribe to:
Comments (Atom)